The room is a soft yellow, the ceiling, trim, closet doors, window blinds and duvet are white. I picked black and cream toile fabric and black/cream ticking for the linens. The classic combo. It's a departure for me (read: frilly) as I'm pretty restrained when it comes to patterns. My uber-talented sister Leslie sewed a slipcover for the headboard, and covered some pillows in the same fabric for me about two years ago. I've said it before, she's a whiz at the "needle-y arts!"
The last time I tried using a sewing machine was in 8th grade Home Ec. at Locust Valley Junior High. I made a very lame peasant skirt and an even more lame tennis dress, and I never looked back. I have no patience for "close work" like that. Gimme a creme brulee torch, a paint brush or a sledge hammer, and I'm a happy girl.
In a perfect world, I'd tear down the ceiling, take off the paneling and rip out/rebuild the closets and shelves. Oh, and have baseboard heating installed. But that's not happening since I directed "many zeros" toward repointing the brick and re-stucco-ing the entire outside back wall. And so, we spruce!
 The bookshelves are too plain.
  I was going to wrap the shelves in fabric and call it a day, but instead I decided to paint the shelves (tops and bottoms) and inside walls with glossy black paint. I put toile-patterned contact paper, more formally known as "self adhesive decorative covering" on the back wall and finished off the front of each shelf with trim. I used trim called "gimp" which is a woven band of fabric, but you can use "rickrack" which is a zig zag, or trim with pom poms (go nuts!) or plain ribbon. Or use nothing. I like the finished look of the 1/2" gimp, and the contrast against the paint...so everything's not so dark.
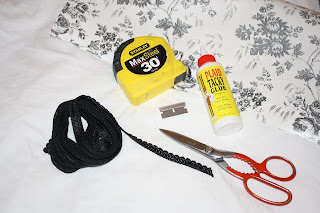
 Supplies you'll need:
Paint, brush and rag (I used leftover glossy black that I had from repainting a wrought iron railing)
Contact Paper
Trim
Craft Glue (dries clear)
Scissors
Straight Edge Razor Blade (to make the final cuts to the contact paper once it's in place)
Measuring Tape
First, open the window a crack to ventilate!
Paint the inside walls, tops and bottoms of the shelves, and leave the shelf fascia yellow, for some contrast when the trim is applied. Leave the back wall unpainted---no need to waste paint or energy. The paint was thick, so I only needed one coat.
Measure out and cut lengths of gimp. Run a light bead of craft glue on the top backside of the trim and press it onto the front of each shelf. The glue does dry clear, but a dab'll do ya.
This 1874 house is not level or plumb...and some shelves were not 100% straight. This is a cosmetic fix, not a carpentry project--I didn't want to open a can of worms by rebuilding! The back wall of each shelf was a different measurement. I left some overage for each, placed the contact paper straight-on and used a razor blade to cut off the excess. Smooth it as best you can, and if there are stubborn air bubbles, make a slit with the razor blade and force the air out. It's a busy pattern...no one's going to see any marks!
Doesn't that just look better? I think so!
Total time invested: 2.5 hours + paint drying overnight
Total cost for curtains and shelf update: $75.00
4 curtain panels...$50.00 from http://www.bedbathstore.com/
Contact paper...$15.00 incl shipping for 1 roll, from http://www.amazon.com/
Gimp...$10.00 for 14' from M&J Trimming in NYC
Re-used curtain rods
Used leftover paint
Already had the glue and tools
Oops, let me get those scissors off the floor. On to the next project!


That looks fabulous!
ReplyDelete