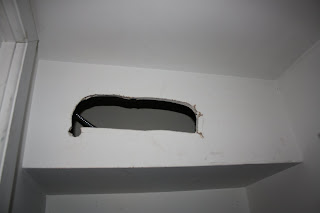
I cleaned up (read: paid for) the mess after my ex exited, and my (licensed) electrician has done his share of shaking his head. Indoor wiring and conduit used outside, uncapped wires snaking out of a pull box without a cover, test holes in the 100+ year old tin ceiling in the kitchen, etc... It's all been taken care of, but one gaping 16" x 9" hole in a soffit revealed itself recently when I emptied out a den closet. Yes, he did need to access the area to pull wires, but what kind of a contractor (or husband) doesn't patch up a hole like that?
Anyway. This drywall repair job took me 15 mins at the front end to prep and patch, 24 hours to dry, and 15 mins at the back end to sand and paint. No big whoop.
Tools you'll need:
Self Adhesive Wallboard Tape
Joint Compound
Square Drywall Repair Patches (I bought 1 8" x 8" at Home Depot, and I had 2 smaller ones on hand)
4" Wide Putty Knife
Sandpaper--220 grit
Touch Up Paint--white satin, in this case.
The whole job cost $4.75 because I had everything I needed, except for the larger repair patch. I won't count the roundtrip on the subway, because I passed by Home Depot and picked the patch up on my way to a birthday party in Chelsea.
1. Prepare the surface. Sand the edges of the cut area, and wipe the area clean of dust.
2. Remove the paper backing from the metal patches and apply over the hole. They have self adhesive tape around the edges, but I used a little extra from the roll, for the top of that middle patch to make sure it stayed in place.
3. Apply Joint Compound using the putty knife. Like I've said, it's just like frosting a cake. Spread it evenly, and extend a bit beyond the repair area. Let dry for 24 hours.
Goes on dark gray...
...dries light gray.
4. Finish the surface by sanding smooth, but not so far down that the mesh peeks through! A quick once-over with white satin paint, and the soffit is as good as new.
 Twister, anyone?
PS. I threw away the keys to the Bitter Bus years ago, but every once in a while, I wonder if it was fully HIS arena...


Haha! The bitter bus, that's a great one. Very handy work, I'm learning even I can do stuff like this around the house. I used to just write checks for jobs like this (and the fireplace doors).
ReplyDeleteThanks Dale.
Tom M